So I haven’t posted much on my progress as of late. It turns out I actually finished this chest already so I’m posting now after the fact. I could probably go on in various detail about this project, but I intend to wrap it up so I can move on to the next thing. There were all sorts of little things that happened throughout this project and, rather than explain those here, I’ll sprinkle those as their own posts in the future.
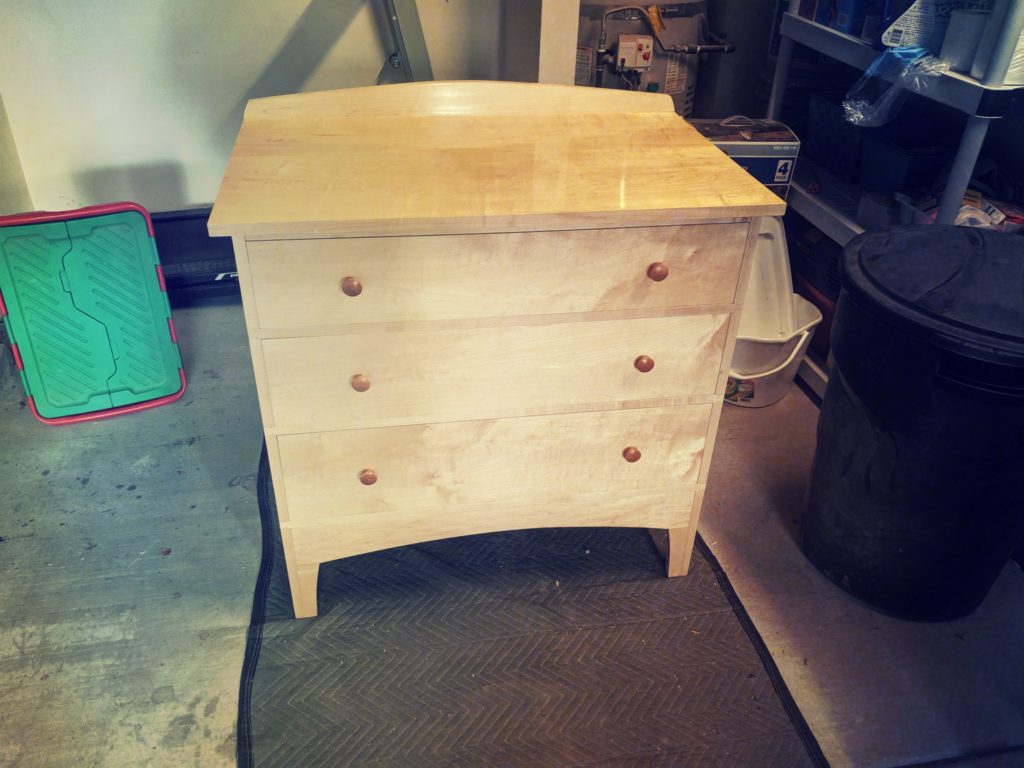
Now, moving on. With the first drawer finished, I went on to complete the other two. That part went fairly smoothly although I had to be sure not to push all the drawers in at once since there was no way to get them back out. To solve that I purchased two maple Shaker wooden knobs for each drawer. I installed those about 6″ from each side as that is what looked most balanced to me.
Next, I cut the bottom pieces that form the front legs. These are slightly curved and simply glued to the case side to complete the arc that was started via the stretcher mortised just below the bottom drawer. I wasn’t as careful as I could have been so there were some glue seams that couldn’t be planed or sanded away. I’ll be detailing mistakes such as this later.
I also cut a piece the length of the chest and about 3″ wide. This piece will be screwed to the back side of the top as a barrier so things don’t roll off the back of the chest. I slightly curved the top with a spokeshave and made a shallow rabbet where it joins the chest. Lastly, I sized and cut a piece of 1/4″ plywood to fit on the back of the case and screwed it to the drawer shelves. Traditionally, this would have been done with a collection of ship lapped boards nailed in or a very large single board if the material were available.
Construction is officially complete at this stage. I took a smoothing plane to the large surfaces and a card scraper to most everything else. I make a single pass with some fine sandpaper and took the sharp edge off all surfaces. Last stage for this project is finish. Finishing is its own specialty it seems so I won’t go into great detail here. For my purposes Shellac seemed a suitable finish for this. It’s easy to apply, easy to repair, and can be buffed to an acceptable shine.
I laid out the drawers over my saw horses with the faces up and placed riser blocks under the feet of the chest. I chose to purchase Shellac flakes for this because my canned Shellac was aged and I didn’t trust it. I also wanted to experiment with mixing my own cuts. I started with a very thin 1 lb. cut and brushed it on. I brushed on one more coat of the 1 lb. cut and then moved on to a 2 lb. cut for faster coverage. It turns out my lighting was somewhat poor so I couldn’t see the brush strokes that were developing. After the 4th coat I inspected the surface and noticed the issue. Upset, I heavily sanded back the surface almost to bare wood so I could start over. I adjusted my lighting and I started again with two coats of a 1 lb. cut and finished with three more coats of a 1 1/2 lb. cut. I made sure to let the Shellac cure for a couple days and then I took some steel wool and paste wax and then buffed it out with a microfiber cloth. The result was a nicely smooth, slightly reflective surface.
All in all, I’m quite happy with the final product. It tested the limits of my knowledge and experience and I certainly learned many things. I feel I was lucky that I didn’t severely damage anything or make any mistakes that were irreparable. As with any hand crafted piece, there are mistakes and tool marks. However, I feel those are what set apart hand made pieces and make them unique. That and, with care, can last a very long time.
Be First to Comment